I needed to add a cheap heated bed to my Printrbot Simple Metal 3D printer, but I didn’t feel like spending extra for an upgraded build size. The current print size is fine for my needs, and to be honest, I really just need a heated bed to prevent warping on some prints I’m working on. I’m also not a fan of the 12 or 24 volt DC heating systems available as they require large power supplies and just add extra bulk and cost. 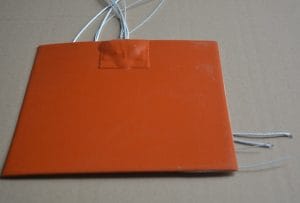 My solution is to use a 110v AC silicone heater stuck to the underside of my unheated print bed. There is plenty of room for the pad without any modification, and with a cheap solid state relay, it won’t affect the printer. In fact, as it turns out, I was able to install my heater with zero mods, and zero disassembly of my Printrbot. Read on for the details on how to build this upgrade. This solution also works for 220v mains power. Just ensure the heat pad is rated for 220v before you purchase. The same SSR will work, and all other setup and wiring details are the same as for 110v.
CAUTION
This project involves wiring 120v mains power, which can cause serious injury or even death. If you’re not comfortable with this, please don’t attempt this upgrade. Ensure all 120v terminals are covered/insulated to prevent accidental shock.
Parts
There are two main ingredients to this upgrade:
Both are relatively inexpensive and available on Aliexpress.com or Ebay. There are probably alternatives out there, so shop around.
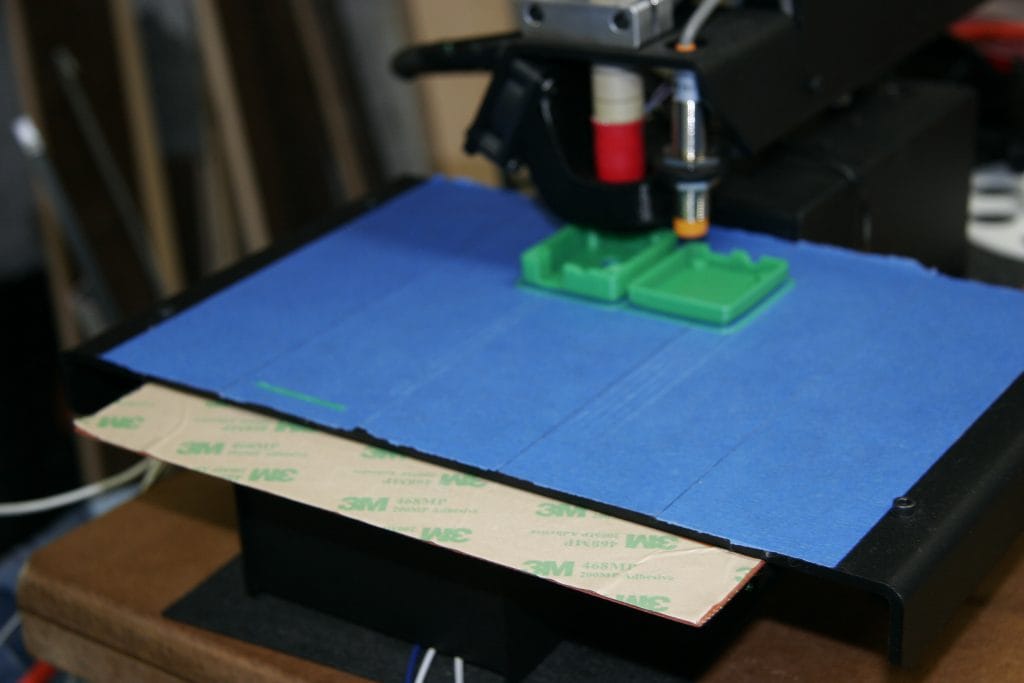
Note: the Printrbot Simple’s bed is not square. I used a 200mm x 200mm square heater, but this leaves 30mm of heater sticking out in front of the heat bed. Not a big deal, but you may want to get a 150mm x 200mm instead (wires on 150mm side). You will also need:
- 16 AWG power cord with 15A plug
- Short length of smaller gauge stranded wire, 18AWG to 22AWG will work.
- Wire connectors (Marettes)
- Box or mounting board to house the SSR
Mechanical Install
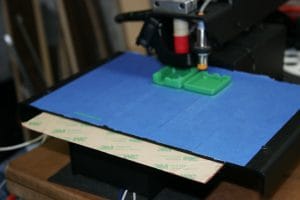
Installing the heatbed in the Printrbot Simple Metal is quite easy. The printer is designed for this, so there is very little work. Test-fit the pad and ensure the wire routing will work prior to permanently installing/gluing.
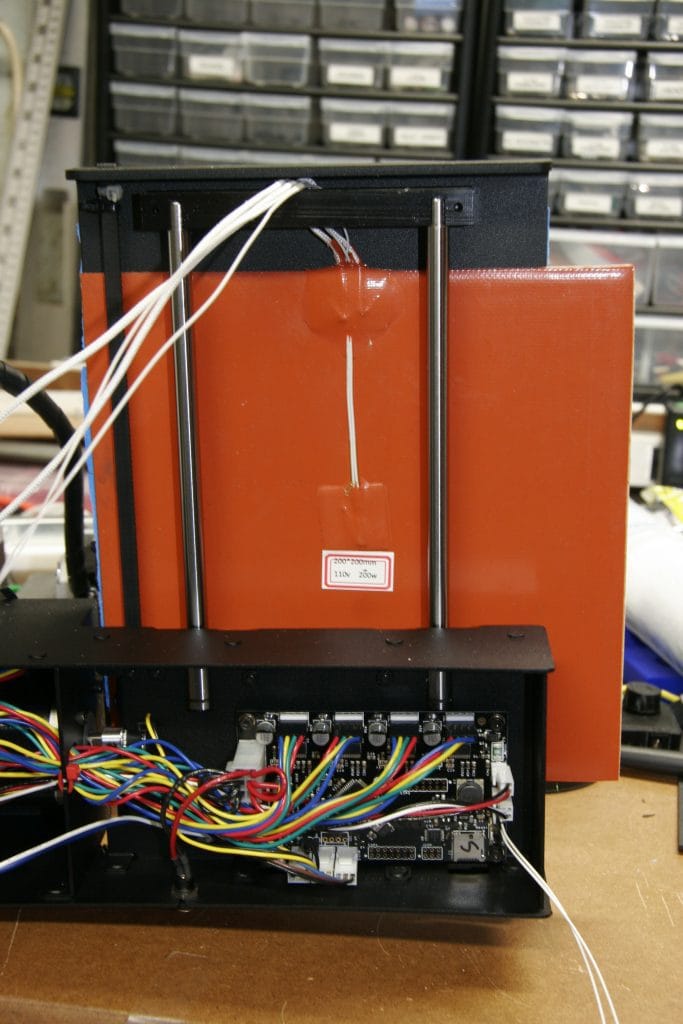
- Locate the heat pad immediately underneath the print bed, above the X belt, with the wires to one end of the X-axis mechanism

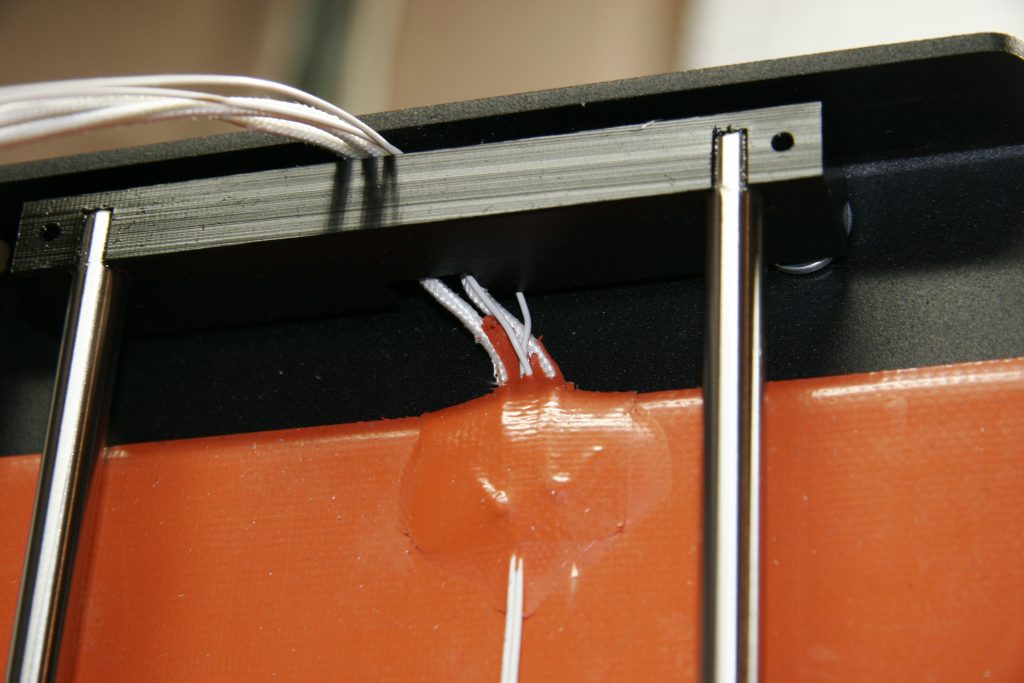
Silicone heater mounted under Printrbot print bed - Run all four heat pad wires (2 power, 2 thermistor) through the print bed mounting bracket (black plastic rectangle). There should already be a notch at the top, against the print bed that you can feed the wires through.

Run all the heater power and thermistor wires through the side rail bracket - Ensure the heat pad is centred properly, and the wires don’t catch or interfere with the motion of the bed.
- Optionally, run the wires through some braided sleeving to keep them neat and tidy and help protect them from snags, etc.
Note: It might be easier to remove the print bed, flip it over and install the heat pad without any obstructions. I didn’t bother as I was lazy and didn’t want to re-level my bed.
Wiring
Once you have the necessary parts, we need to wire them up properly and safely. The heater should have four wires coming out of it: two thick wires and two thinner wires. The thick wires are the power connections to the heating element. The thinner wires are connected to the thermistor. See the diagram below.

With the power and USB cables disconnected from the Printerbot:
- Connect the 120v mains Hot wire (black) to one terminal on the load side of the SSR.
- Using a wire connector, connect the 120v mains Neutral wire (white) to one of the thicker wires of the heat pad.
- Connect the second thicker wire from the heat pad to the other terminal on the load side of the SSR.
- Using some short lengths of the thinner wire, connect the positive (+) terminal of the SSR to the heatbed terminal on the Printrboard closest to the main power connector.

Heater power output from Printrbot (wire this to control SSR) - Connect the negative (-) terminal of the SSR to the remaining terminal on the Printrboard heatbed connector.
- Check for short circuits, double check the circuit connection, wire routing. Triple check it even.
- Cover the 120v terminals on the SSR with some electrical tape to insulate from accidental contact or short circuit.

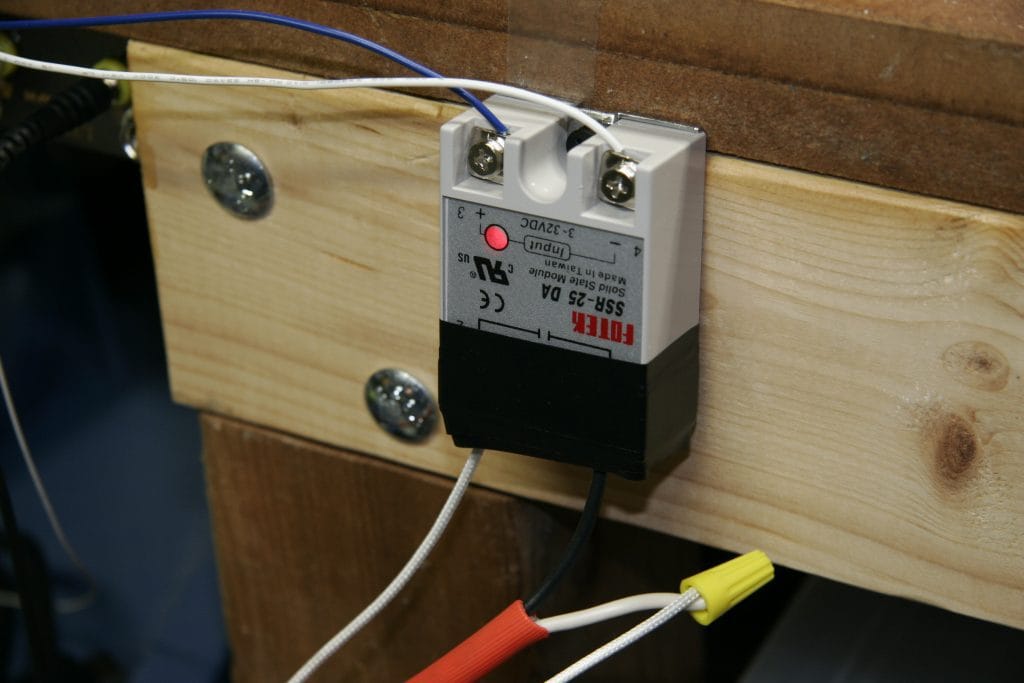
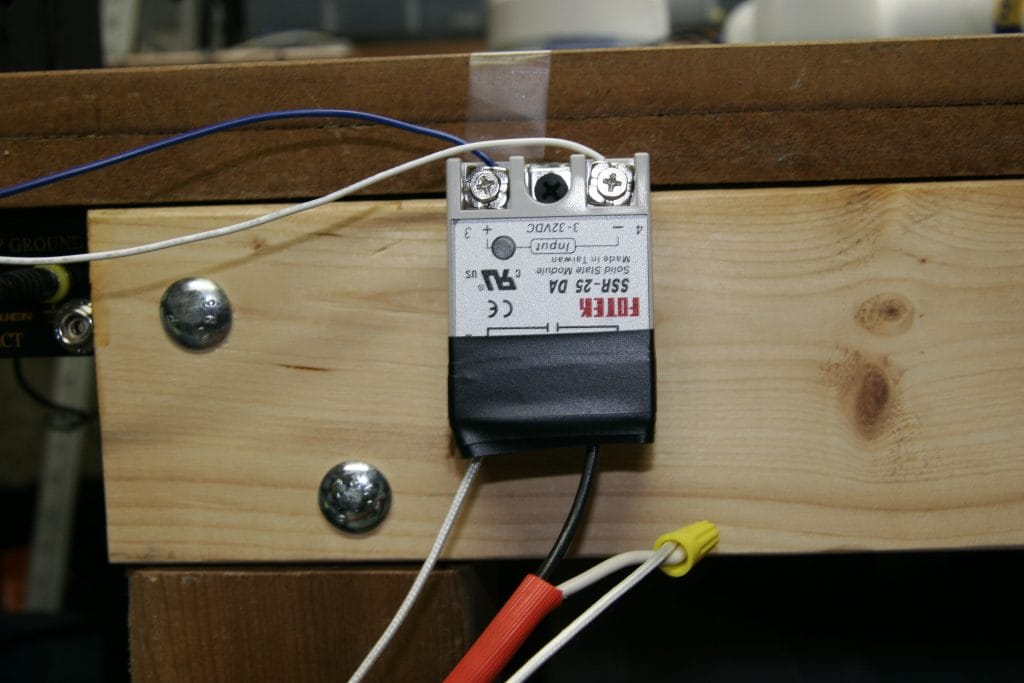
Wiring of the SSR. Blue and white wires on top go to Printrbot controller, and the white and black 120v wires on the bottom are for the heated bed power. - Install the SSR into a box, or securely mount it in a safe location, away from children’s curious hands, pets, etc.
- Plug the 120v cord into a wall outlet (nothing should happen until you enable the heat bed in software)
Testing
Once the wiring is done, you can test the heater by launching Cura (or whatever printing software you use) and set the heat bed temperature above 50 degrees C. You should see the indicator light on the SSR turn on, and the heat pad start to warm up. Your printer software should measure the heat pad temperature rising, and eventually steady out at 50 degrees. Congratulations, you now have a heated print bed!




please, how to calibarte the SSR for silicone plate 300x300mm 220V 300W?
thank you
There shouldn’t need to be any calibration, as the SSR simply turns the heater on/off while the Printrbot controller monitors the temperature feedback from the thermistor.
You can order those heater pads from keenovo in any size. so anyone else following can order one that fits.
Hello sir ,
Not sure if you still monitor this forum but i have ordered a SSR & Silicone Pad ( 150mm/200mm – 220v) from China … and i have to wait 1 month for it to be delivered … but i ordered the 220v version because i’m in eastern Europe and we have 220v sockets … but now on a second thought i know my Printrbot Metal Simple has a “laptop power brick ” that steps down probably the current from 220v to 110v ?i wonder if I was wrong to order the 220v version instead of 110v ? would it work to hook it up accordingly to your diagram ? would it be a problem if its for 220 and not 110 ?? hopefully i won’t fry my printer while trying to do this upgrade ! looking forward for your reply !